

Are You Already Familiar with Facebook Business Manager?
If you're already acquainted with Facebook Business Manager, you can jump straight to Step 4 to connect with Scooch Marketing.
New to Facebook Business Manager?
If you're new to Facebook Business Manager, don't worry – we'll guide you through the process step by step. Here's what you need to do:
1. What is Facebook Business Manager?
Facebook Business Manager streamlines your marketing efforts by managing business tools, assets, and access. It's your hub for effective Facebook marketing and advertising, offering features like:
Keeping personal and business activities separate.
Monitoring ad performance through detailed reports.
Granting controlled access to partners without transferring ownership.
Maintaining privacy for coworkers by sharing limited information.
2. Creating Your Account
To start, let's create your Business Manager account.
Follow these steps:
1. Visit business.facebook.com and click "Create Account"
2. Enter your business name, your name, and your business email.
3. Complete the prompts and click "Submit"
3. Adding Your Facebook Business Page(s)
Adding your Facebook page is essential.
1. From the Business Manager dashboard, click "Add Page" and then "Add Page" again.
2. Start typing your business page name, select it from the suggestions, and click "Add Page"
4. Adding Assets and Assigning Permissions
For businesses, adding Scooch Marketing involves:
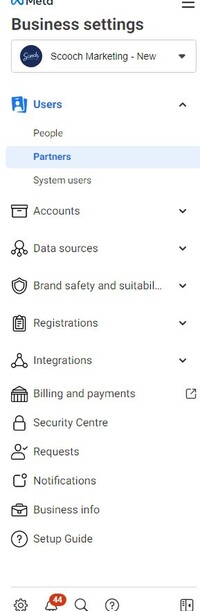
1. From your dashboard, click "Business Settings" and then "Partners"
2. Click "Add" then "Give a partner access to your assets" and enter Scooch Marketing’s Business Manager ID: 1418327485273997 (Scooch Marketing - New).
5. Connecting Additional Assets and Assigning Permissions
Link your Instagram account:
1. In Business Settings, click "Instagram Accounts", then "Add"
2. Enter your Instagram login information and click "Log In"
3. Consider adding more assets like your Facebook Ad account or website pixel.
6. Setting Up Payment Methods
To create ads, you'll need payment methods. Here's how to set them up:
1. In Billing and Payments, go to "Payment Methods" and click "+Add" to add a payment method.
2. Enter your credit card details and select your billing country and currency (this step is really important to select the right currency, as once it is set it can't be changed!)

7. Assigning Access Levels
Managing permissions is crucial:
Set different access levels for team members in Business Manager.
Shift existing assets to Business Manager for clarity and control.
8. Privacy and Security
Your work email ensures transparency:
Colleagues won't see private Facebook profile info unless you're friends.
Using your personal identity helps track changes for accountability.
Sharing personal accounts violates Facebook terms and could disrupt business operations.
Remember, we're here to guide you through this process. If you encounter any difficulties, don't hesitate to reach out. For more details, you can also review Facebook's Terms and Policies at https://facebook.com/policies
We're excited to start this journey with you and create a thriving social media presence for your business!


